The billing section is where you manage the financial side of your account: the credits you spend to run tools, workflows, and agents; the plan you are on; and, if you are a creator, the earnings you withdraw.
Your Run Balance
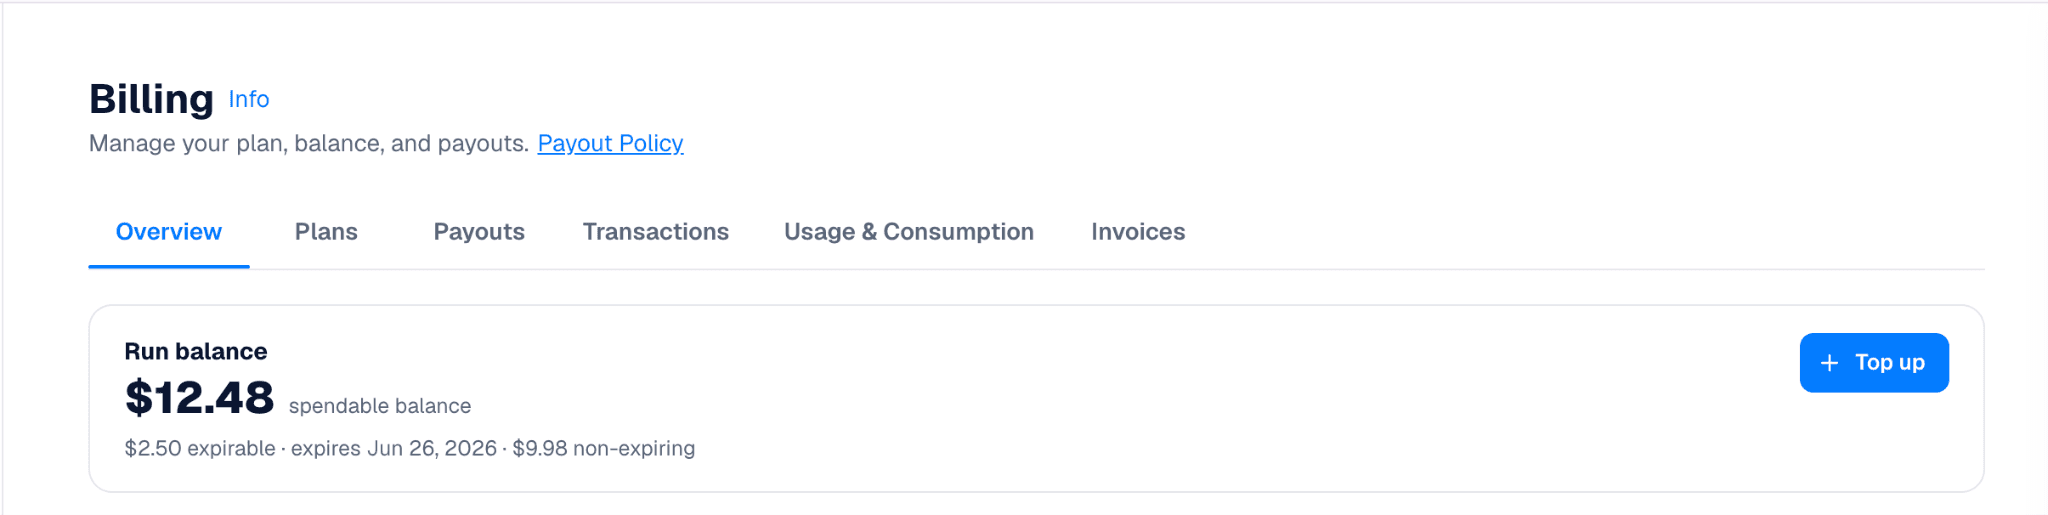
On your billing page, in settings, the first thing you will see is your Run Balance. Think of it as a prepaid wallet for the marketplace: one balance that everything you run draws from. It does not matter what you are running, whether that is an agent, a tool, or an MCP server, it all pulls from the same balance.
Adding to Your Run Balance
Your monthly Run Balance is set by your chosen plan. On your plan, no matter the set balance, you can also top up at any time. Hit the “Top Up” button in your “Billing Overview”, load any amount you want, and it goes straight into your Run Balance, ready to use right away.
Choosing a Plan
There are four plans, so you can pick the one that fits your usage and the number of seats you need:
Free ($0/mo): a $1/month trial Run Balance, 1 seat, and the ability to build and test workflows. Add additional Run Balance anytime.
Pro ($15/mo): a $5 Run Balance every month, 1 seat, unlimited workflow building, publishing to the marketplace and usage tracking. Add additional Run Balance anytime.
Team ($150/mo): an $50 shared Run Balance every month pooled across 5 seats, extra seats at $20 each, a shared workspace with permissions, and centralized billing.
Every paid plan also lets you bring your own LLM keys (BYOK), which stretches your Run Balance further.
What You Pay For
You are only charged for successful runs. If a run fails, it is free, so you are never billed for something that did not work. Because a successful run has already used compute, successful runs are not refundable. If a tool seems to be behaving incorrectly, contact support and the team (help@rival.io) will help sort it out.
Payouts
If you build and sell on Rival, payouts are how you get compensated. You keep 85% of the revenue your tools generate, and those earnings collect in your account over the course of the month. You can always check your account balance at any time under your “Billing” tab in settings.
To receive payouts, connect your bank account through Stripe or PayPal in your account settings in the billing tab. Once it is verified, your payouts go to that account automatically.
Here is how the monthly cycle works:
Monthly cycle: earnings build up throughout the month, and the accumulation period closes on the 23rd. Anything you earn after the 23rd rolls into the next month's payout.
Payout threshold: payouts process automatically at the end of each month through Stripe or Paypal, as long as your balance has reached the $10 minimum.
Below the minimum: if you do not reach $10, your earnings stay in your account and keep building until you do.
Fees and timing: Stripe or PayPal may apply processing fees depending on the transaction. Bank processing times vary, so the exact arrival date can differ.
If a payout ever looks wrong or did not process, email help@rival.io with the subject line “Payout Dispute” within 60 days of the payout date, and the team will dig into the right cycle.
Keeping Track
The billing section also keeps a running record of everything else money-related:
Transactions: a history of your top-ups, charges, and payouts.
Usage and consumption: how much of your Run Balance you are spending, and on what.
Invoices: records of your payments that you can download when you need them.
TL;DR:
Your Run Balance is one balance that everything you run draws from, and you are only charged for runs that succeed.